Showing posts with label Recipe. Show all posts

Tuesday, July 16, 2019

Peach Crisp...

Oh how I love creating in the kitchen. And as y'all know I love to improvise!  So to be clear the title should be Peach MANGO Crisp


I sliced up 6 or 7 peaches and a mango. Added 1/4 cup of sugar, 2 Tblsp. of flour (for thickening), juice of a lemon (to keep peaches from turning brown), 1/2 tsp. of vanilla, salt and cinnamon. Let it sit for 20 minutes to pull some of the juice from the fruit.


In a separate bowl, blend the following together with a fork, pastry blender or your hands. 
1/2 cup each flour, old-fashioned rolled oats and brown sugar
1/4 tsp cinnamon, nutmeg and salt
1/3 cup cold butter, diced into small pieces


Pour peaches into a baking dish and top with the rolled oat mixture. 


Bake at 375° for about 30 minutes. Delicious served alone, with ice cream or fresh whipped cream.


Thursday, June 20, 2019

Creme De Mints


The first time we had this "cookie" was at my Aunt (in-law) Zora's. She is from Croatia and our son fell in love with it.  At our daughters wedding we had them on the cookie table and a dear friend of mine said she would like them for her son's graduation party. Well any excuse I have to bake, I am on it!


There are three layers to this bar cookie. The base layer is kind of like a thin cake. The middle layer is the minty part. And the crowning jewel is the thin layer of milk chocolate.

Note - as we work through the recipe you must understand I am a dump and throw kinda cook and use a recipe as a guideline. While I try to follow the portions and ingredients sometimes you have to improvise.

The base layer is pretty basic. You beat together 1/2 cup butter (remember this is an old recipe "oleo") and 1 cup of granulated sugar. Next blend in 4 eggs. Lastly, add 1 cup of all-purpose flour, 1/2 tsp. salt, 1 tsp. vanilla and 1 pound of Hershey's chocolate syrup. 

*Hershey's no longer sells their 1# cans but the bottles contain the same syrup so you will need 16 ounces. This is one of the places I improvised. The bottle I had was 24 oz but I was making a double batch. So while it was a little shy on chocolate syrup there were no complains or leftovers.

Pour the cake mixture into a 9 x 13 pan and bake for 25-30 minutes at 350° F. 

*Again, improvisation...I greased my pan. Original recipe says ungreased.


Once your cake is baked and cooled. Beat together 1/2 cup butter, 2 cups of powdered sugar and 2 Tblsp. creme de menthe. Usually found with the liquors in your grocery store or at a state liquor store. Spread the mixture over the cake and refrigerate until firm.


The last step is to melt 6 oz of semi-sweet chocolate chips with 6 Tblsp of butter. You can do this on the stove top or in the microwave. I did it in the microwave for 30 seconds then would mix it, then another 30 seconds. Once your butter melts you can continue to stir and it will melt the chips.  Spread this over chilled cake immediately. And pop it back in the frig to firm up.


When you're ready to cut it, take it out of the refrigerator and allow to sit at room temperature for at least a half an hour. In the picture below you will see I trimmed the edges to get nice straight lines. You don't have to do this...it was for a graduation party and I wanted it to look nice. **Plus my son got to have all the edges.


I cut mine into approximately 1" squares. If you keep paper towels handy and wipe your knife in between each cut you get cleaner edges. 


 I hope you enjoy this bar cookie...something a little different but VERY tasty.


Sunday, December 29, 2013

Ham Cheddar chowder

Merry Christmas and a Happy New Year! Hard to believe 2014 is upon us.

With leftover ham from Christmas I thought a nice cozy chowder was in order. The weather this evening is rainy and chilly with snow on the way.

I am definitely a "dump cook"...I dump things in, taste and add accordingly. To enjoy cooking I think if you want to enjoy cooking you have to be that way. Use measurements as a guide, then add or subtract to suit you and your families pallet. Use what you have and be creative. Taste it, and if you like it...go with it. If not, add something to change it until you do :-)

OK, enough chit chat...onto the recipe...

Ingredients
2 cups of water
2 cups of peeled and cubed potatoes (bite size)
1/2 cup of peeled and chopped carrots
2 cloves of garlic, minced
1/2 tsp each of salt and pepper
*****
1/4 cup of butter
1/4 cup of flour
2 cups of milk
8-oz of shredded cheddar cheese
2 cups of corn, fresh or frozen
2 cups of cooked cubed ham

Instructions
  1. In a large pot add water, potatoes, carrots, garlic salt and pepper. Bring to a boil and simmer until vegetables are tender, approx 10 minutes. Add the corn and ham and reduce the heat to low.
    Vegetables, Ham and Veggies
  2. In a different, medium sized pot melt butter then whisk in flour, over a medium-low heat. Cook a couple of minutes, then add the milk. Whisk periodically until white sauce (aka bechamel sauce) thickens.
    Bechamel sauce
  3. Stir in cheese until smooth.
  4. Pour cheesy bechamel into the large pot of ham and vegetables. Heat through and taste. Add seasoning if you desire.

Cook's notes
I used a hand grater for the garlic, faster and easier and less mess.
If you don't like carrots, leave them out. You could use peas or your favorite vegetable.
I used leftover corn I had in my frig.
Freeze leftovers and to pull out for a fast meal later. You will probably have to add some milk while reheating.


You could add some crusty bread or a salad for a full meal. 


Thursday, October 10, 2013

Pumpkin cake/pie...


 PUMPKIN CAKE

Mix 1 box of yellow cake mix, 1 egg and a stick (1/2 cup) of butter/margarine together. Reserve approx. 1 cup and press remaining crust into bottom of a 9x13 baking pan.


Blend together 1 large can of pumpkin puree (29oz), 3 eggs, 3/4 cup granulated sugar and 2 tsp. each cinnamon, nutmeg and pumpkin spice.


 Spread on top of crust.


Combine reserved cake crust mixture with 2 tablespoons of butter/margarine and 1/2 cup of chopped nuts. Crumble over top of pumpkin mixture.


Bake at 325° for 50 to 60 minutes.


Brew a cup of tea or coffee, invite a friend over and enjoy.


Saturday, April 28, 2012

Heath cake...

Hard to believe this is my first post of 2012. I'd like to say I will post more regularly now. I'd like to but who knows what my day to day life will allow. I decided to post today about a cake I just made and it was so easy and delicious I wanted to share it. While wondering around Pinterest, which I love to do, I found the yummy goodness and made it for friends who were coming over. The original recipe can be found here at Bird On A Cake. The first time I make a recipe I follow it to the T, then modify to suit my families tastes and my style. While the sauce was delicious I don't think it was necessary, but would make the PERFECT ice cream topping.

Once you bake your favorite chocolate cake in two 8" round pans, allow it cool completely.  Cut each cake in half so you end up with four layers.

The icing couldn't be simpler. Pour 1 quart of whipping cream, 1/3 cup cocoa powder and 3/4 cup granulated sugar into a bowl. Whip it until stiff peaks form. Lay one cake layer on serving plate, spread with cocoa whipped cream and sprinkle with crushed Heath bar on top. Repeat with remaining 3 layers. OK...so I lied (a little)...I didn't follow the recipe to a T. Robin folded the Heath bar into the whipped cream but I liked the control of being able to sprinkle the perfect amount on top. Also I did NOT ice the sides. I thought it was so pretty to see the seperate layers.

You could keep several round cakes baked and in the freezer and when you need a fast dessert you're half way there. I also thought about yellow cake with butterfinger. Maybe use Reese's cups instead of Heath bar.

Wednesday, May 18, 2011

Dinner...

It has been snowing or raining here in Northeast Ohio for what feels like FOREVER!!! We had two nice days and I was soooo excited. We are ready for summer food! You know...anything on the grill, pasta salads, all kinds of salads really, fresh fruits and veggies. As much as I enjoy cooking and eating winter food (soups, roasts, casseroles) I'm 'over' them right now. Today was no different, weather wise, than yesterday and the day before, and the day before and....well you understand.

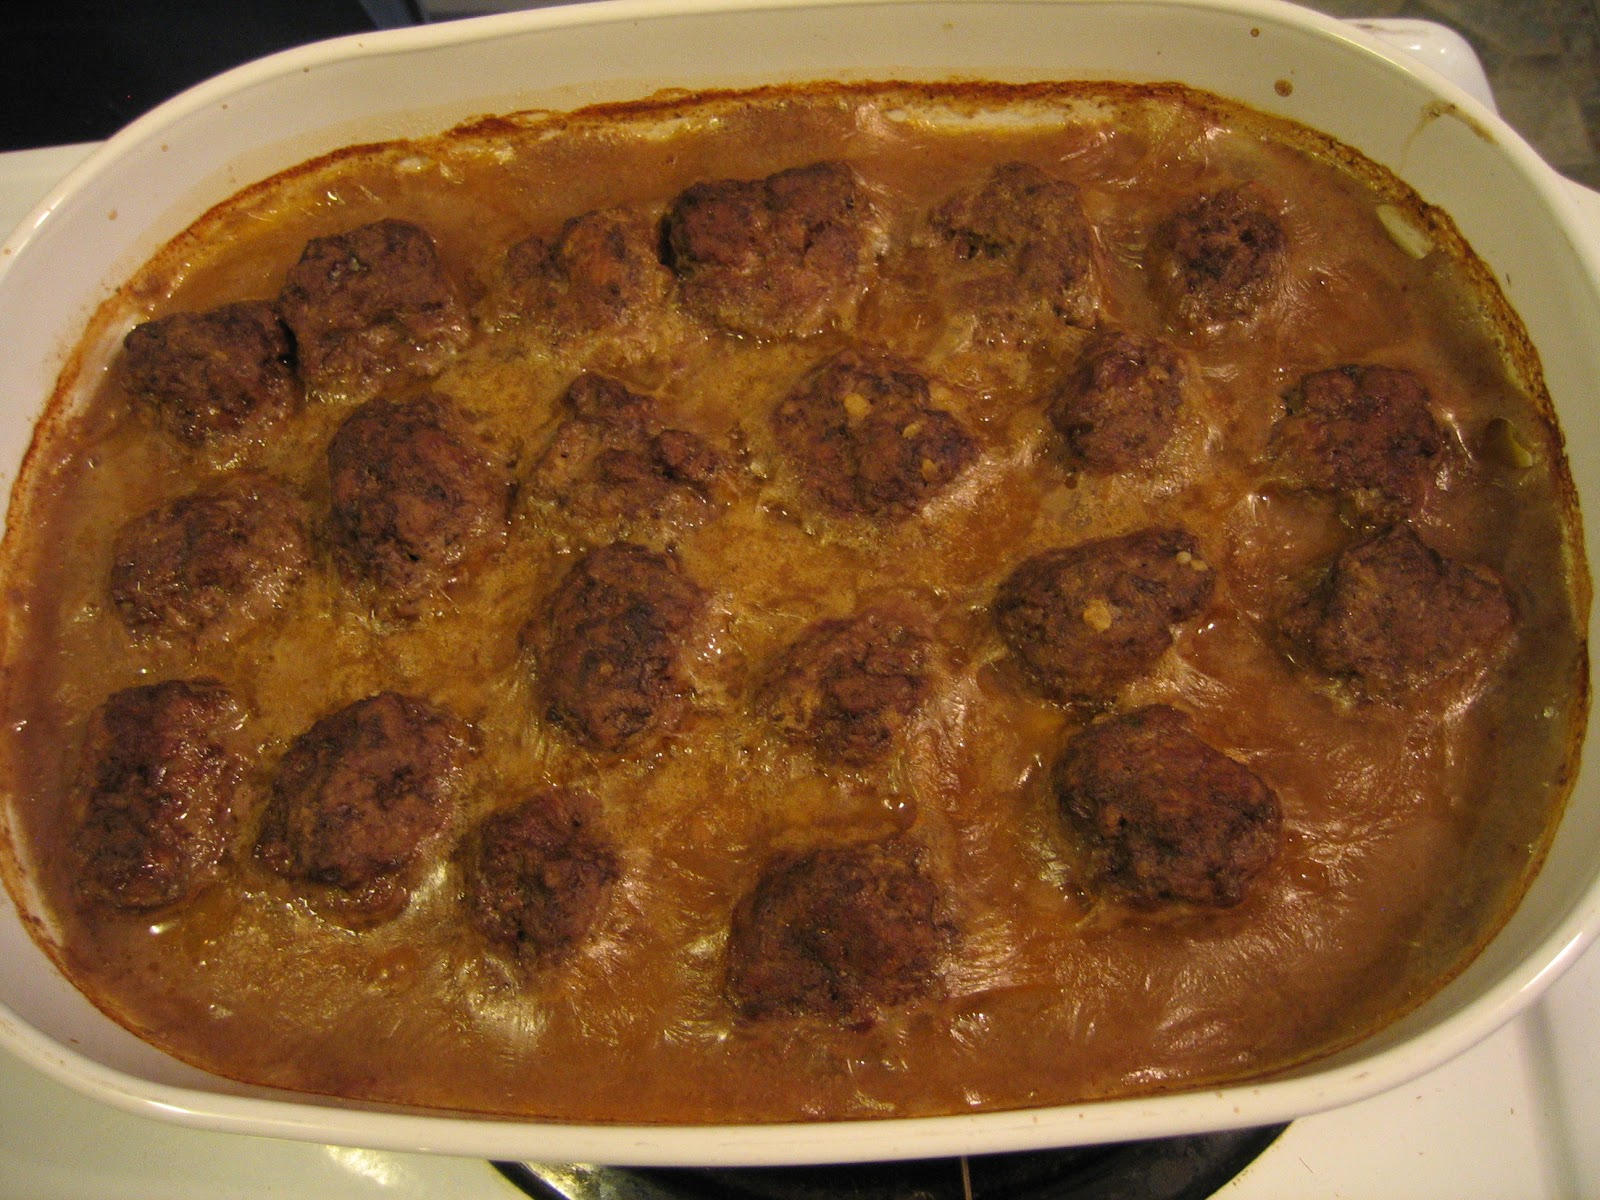
I decided to make meatballs for dinner tonight. I was going to make them sweet and sour but since it's a bit chilly and gloomy decided it was beef gravy and rice. Mixed some spices into my meat, formed the meatballs and browned them in a skillet. Moved them to a casserole dish and put them in the oven. Made a rue in the skillet and then beef gravy. Poured it over the meatballs and let them bake for about an hour. I wanted to make wild rice but didn't have enough so just used brown rice. A little boring but tasty.


Come on summer...Mama is hungry for kabobs and corn on the cob grilled over an open flame!

Monday, March 21, 2011

Dijon spinach salad...

I know I mentioned the ingredients in this salad but I thought I would pass along the actual recipe. I was sooo surprised with how much I enjoyed this salad. My 13 year old was especially fond of it, too.

DIJON SPINACH SALAD


8 c. torn fresh spinach
1 c. shredded red cabbage
1 c. thinly sliced cauliflower
1 c. thinly sliced red onion
1/2 c. sliced radishes
1/4 to 1/2 c. vegetable oil (I used 1/4 cup)
1/4 c. cide or tarragon vinegar (I used red wine vinegar)
2 Tbl. Dijon mustard
2 tsp. sugar
1/4 tsp. salt
2 Tbl. sesame seeds, toasted


In a bowl, combine the first five ingredients. In a jar with a tight-fitting lid, combine the oil, vinegar, mustard, sugar and salt; shake well. Pour over the salad and toss to coat. Sprinkle with sesame seeds. Serve immediately. Yield: 10 servings


Nutritional analysis: One 3/4-cup serving (prepared with 1/4 c oil) equals 80 calories, 156 mg sodium, 0 cholesterol, 5 gm carbs, 2 gm protein, 7 gm fat, 2 gm fiber.

Friday, January 7, 2011

SNP aka Taco Soup...

I love to cook, bake, can...just being in the kitchen creating is my favorite place to be. Making soups and stews is a so enjoyable on these cold winter days. It's such a great feeling having a pot of hot delicious soup simmering on the back of the stove...ready for the next cold hungry family member coming in from outside.

While looking around the internet I saw a recipe for Taco soup. Why hadn't I thought of that?! I love stuffed pepper soup which is made my throwing all of the ingredients for stuffed peppers in a pot, so why not do the same with Taco's? My family loves tacos.

Anyone who knows me knows that my favorite way to cook is to throw things together. I start with a basic idea and then just start adding things, tasting, correcting what I don't like and calling it food. The downside? It makes it hard to duplicate the same thing again. Well here's a shot at telling you how I made Taco Soup aka S#*t N a Pot (SNP).

I browned up about 1 1/2# ground beef, added a onion and green pepper finely diced. Drain off excess fat. Then stir in a can of corn, black beans and chopped tomatoes, all UNdrained. For seasoning I added taco seasoning, garlic, salt, pepper, hot sauce and cumin...all to taste. At the end I added about 1/4 cup parmesan cheese. When you serve it you could top the soup with smoked cheddar cheese, Doritos, corn chips or anything along those lines. You might like to stir in a dallop of sour cream. I hope you enjoy this very easy, flexible and delicious soup.

Friday, July 30, 2010

Blueberries...yummm...

One of my greatest joys is being in the kitchen.  I love cooking, baking, canning...creating.  I'm definitely more creative in the kitchen than in my craft room.  After I sorted through all of my old magazines I pulled out several recipes I wanted to try.  My family LOVES blueberries.  When my daughter was itty bitty she used to stand at the refrigerating repeating 'buberries, buberries'...they were a must on camping trips.  I have always enjoyed them in muffins and bagels but lately have been enjoying them fresh.

Blend up some fresh or frozen stawberries with some lemon zest, lemon juice and sugar.  Add some fresh blueberries (do no blend them).  Now you have a wonderful versatile snack.  Spoon it over some yogurt and top with granola...easy tasty parfait.  Or, if your like me, and you don't like yogurt...eat the fruity goodness with extra granola...what a refreshing healthy snack.

I usually freeze blueberries for muffin and such in the winter, but one of the recipes I had to try was for ice cream.  That's right...homemade blueberry ice cream!!!  I took the opportunity to take some pics along the way so I could share the recipe with you.  The recipe is from Alma Mosher and was published in the May/June 2004 edition of Country Woman.

There are only 4 simple ingredients:
4 cups of fresh or frozen blueberries
2 cups of sugar
2 tablespoons of water
4 cups of half-and-half cream

Combine the blueberries, sugar and water in a large saucepan.  You will be tempted to add more water...don't.  Just start at a medium heat and stir them around every few minutes.  The directions say to bring to a boil, reduce heat and simmer (uncovered) until sugar is dissolved and berries are soft.  As I stirred them I would mush the berries a little.  The whole process probably took about 20 minutes.  But, as usual, I was doing this while I was doing 3 other things so I'm no real sure.

Next I strained the mixture and discarded the seeds and skins.  I did this using a mesh strainer and the back of my spatula.  You could use cheesecloth or a food mill too.  I might leave the berries in it next time (will just have to make sure all the stems are off first)...I think the family would like that too.

Last step for today is stir in the half-and-half.  Cover it and refrigerate it over night.

Good morning...time to make the ice cream!  You will need an ice cream maker of some sort.  New fangled electric or old fashion crank...whatever you have available.  Fill your ice cream make 2/3 of the way full and process according to mfg. directions.  I have a krups maker and you simply turn it on, pour mixture in and let it run for about 20-30 minutes.

You can either enjoy your ice cream soft from the maker or let it harden up in the freezer for a bit.  Either way...it's a little taste of Heaven.  While homemade ice cream may not be "cost effective" it is certainly worth the minimal time invested.  We are already brainstorming about what flavors we can come up with...I think banana is next!

Sunday, November 15, 2009

Patty Cake Cookies...

After being inspired by my new cookbook I thought I would try my hand at posting a recipe. I have taken pictures during preparing several different dishes but never felt comfortable posting. I enjoy baking and cooking. And think I'm pretty good at it...and I am not one to toot my own horn. I happened upon a blog called The Pioneer Woman a few years ago and instantly fell in love with the stories, pictures and recipes. After sharing it with my Mom she apparently became hooked too. She surprised me with a copy of Ree's cookbook. Downhome recipes, normal ingredients and amazing pictues. Thank you Mom!!! After reading (yes reading) her cookbook it gave me the confidence to post a favorite of mine...so here goes....


Ingredients:
2 c brown sugar
2 c granulated sugar
1 lb (4 sticks) butter/margarine
2 tsp vanilla
4 eggs
4 c flour
2 tsp baking soda
2 tsp baking powder
12 oz chocolate chips
1/2 c chopped pecans
2 c minute oatmeal
2 c crushed corn flakes


Cream the sugars and butter. Add vanilla and eggs. Blend flour with soda and baking powder, then add to sugar mixture. Finally add chips, pecans, oatmeal and corn flakes. Drop by rounded tablespoon onto baking sheet. Bake at 350F about 12 minutes.


These are large, yummy cookies. I am not one to follow a recipe to the letter. Therefore do not be afraid to substitute different flavored chips, nuts or cereal. I have used regular oatmeal if I was out of minute oatmeal. I think some people are afraid of cooking/baking because if they don't have the exact item in the exact quantity specified they fear the recipe will fail. While this may happen sometimes...other times that's how other great food is born. So get in the kitchen, make something yummy and have fun!!